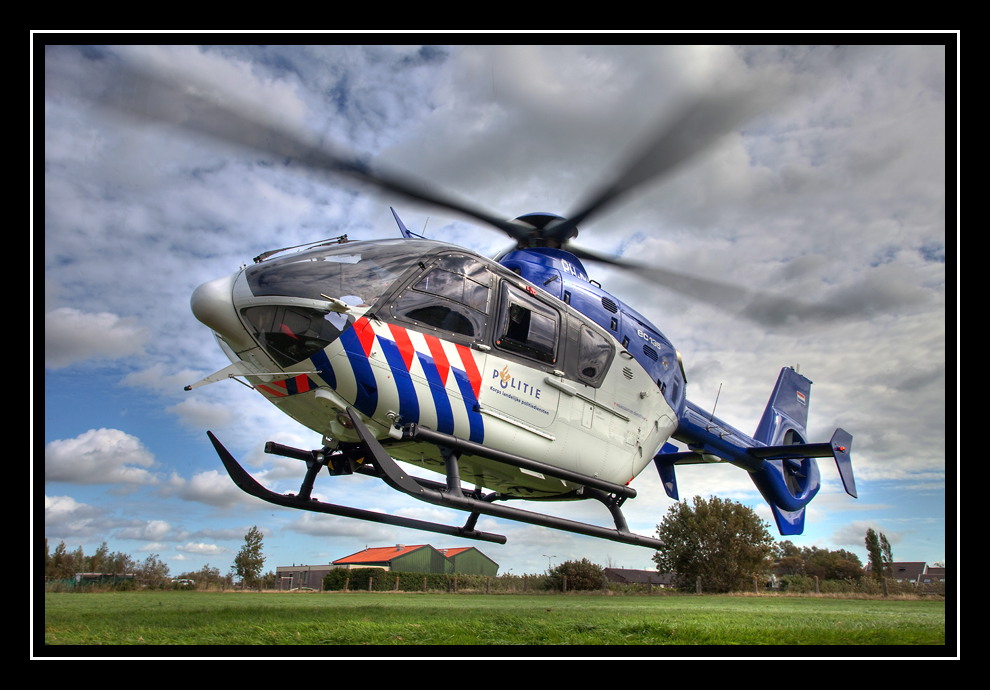
As I was preparing some photos for a digital slide show, I remembered NFLineast's daylight HDR shots from Wales. This technique fascinates me, so I looked for a photo to try it on. It all seemed so simple, but it is rather challenging......!
Having used Photomatix HDR-software in the past, and having read a few bits and pieces about it, I started playing with a photo which has high contrast, bright colors and plenty of problem areas. I fiddled for about an hour, pushingh and pulling all the sliders in Photomatix Pro 3.0, and then making some more adjustments in Adobe Photoshop CS4. After an hour I was quite pleased with the result, but I was still missing something. Usually I can come up with what it is (colorbalance, contrast, vibrance or sharpness etc), but with HDR it is all a bit different because the overall image has a different presentation.
And that's where I need your help...... Can anyone give me a clue on what I should do different, or which better correction I could make to make the overall photo look better ?
In order to make it possible for everybody, I have added some screenshots, which will take you through my processing process. Next to that I have uploaded the original CR2-file, so that you can try to recreate your own best version of this particular shot and compare it to what others did.
But let me start with my own result first:

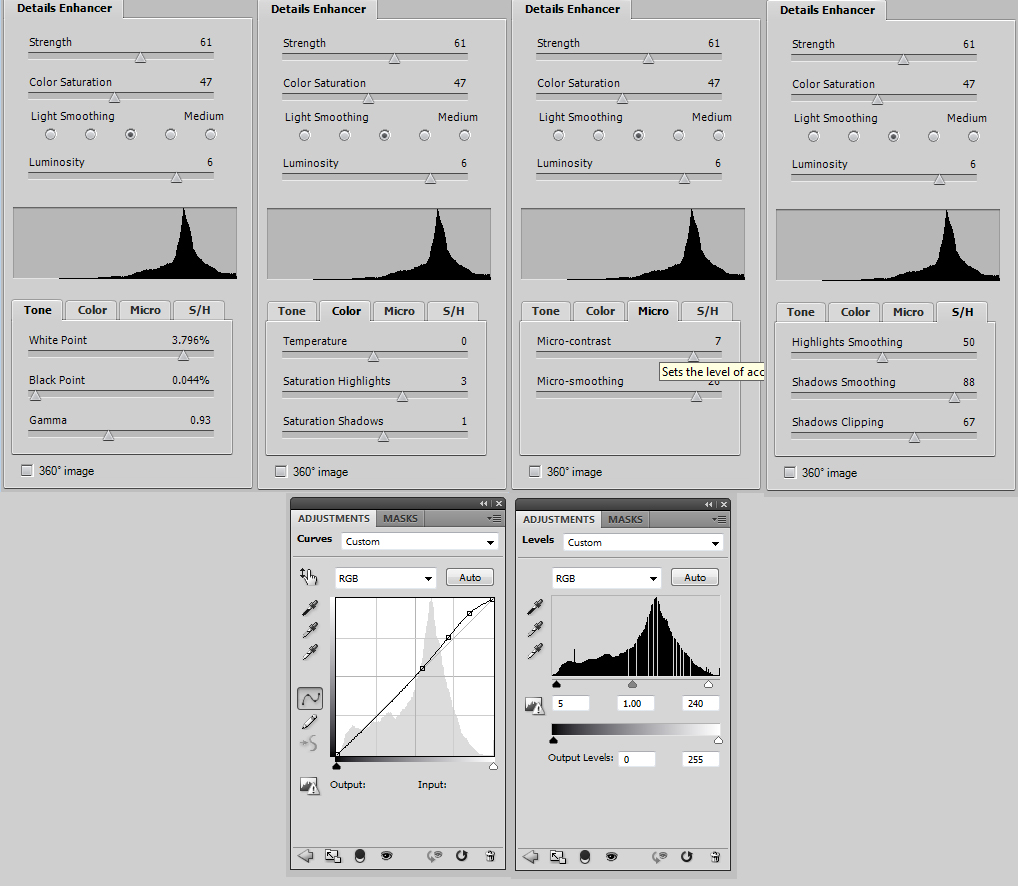
Now here is what I did, step by step......
1. I used Adobe Lightroom 2.5 to open the CR2 and make a few regular adjustments, as for any ordinary photo
2. From Adobe Lightroom 2.5 I extracted five images from the same CR2-file, but all with a different exposure (-2, -1, 0, +1, +2)
3. In Adobe Photoshop CS4 I saved all five images as high resolution JPG's, under a different name
4. All five JPG's were loaded into Photomatix Pro 3.0 by using the "Generate HDR" button, and after some seconds an extreme contrast image of my photo became visible
5. After pressing the "Tone Mapping" button, I got a better photo, and the option to adjust the image with the "Details Enhancer" and "Tone Compressor"
6. After playing with about all sliders and options, I used the "Process" button and saved the result as a TIFF-file
7. The TIFF-file was opened in Adobe Photoshop CS4, and several corrections were made in curves and levels
8. As the final step, some blowing grass was removed with the Spot Healing Brush, and the image was resized, sharpened and fit into a borderframe.
Now if you want to try this yourself and compare your own version of this image with others, please download http://www.dappa.nl/KLPD-EC-135-HDR.CR2 to start with. I take it that you all have Lightroom 2.x and Photoshop CSx, but you might not have Photomatix Pro 3.0. Therefor I will put it on my website for a few days for you to download, install and try it out. You can download it from http://www.dappa.nl/photomatixpro30.exe.
Below you will find a screenshot of the settings which I used myself. I'm very curious what others will create with the same file. Hopefully we can share experiences and give this HDR-technique a bigger go in the aviation photography world. Oh, and in order to let our international collegues join in I prefer if we can try and keep this a topic in English (if possible).
Curious regards,
Iwan


